Adjusting and determining the path of the bullet is an essential operation before we use any gun in general and AR15 in particular.
And to make this process easier, manufacturers have created laser bore sight models to help users make quick alignment without test firing.
From there, it saves both time and effort and the amount of ammo needed.
Because of these advantages, I will show you how to use the laser bore sight Ar 15 correctly and effectively in today’s article.
About Bore Sighting & Its Importance
Bore sighting is a method for the user to adjust and estimate the bullet’s path at the position in front of the axis of the barrel and opposite the target to be fired.
To do boresighting the usual way, you’ll need to use your eyes and aim correctly when the subject is in the middle and within range of the gun’s opening.
Depending on whether the target is mobile or standing, what is the height and size, we will need appropriate manipulation such as the direction of the gun side or down or how to align so that the bullet path is accurate.
With manipulation with the naked eye and relative estimation, it is challenging for us to create accurate shots. Manufacturers of gun accessories have also researched many ways to overcome the limitations of manual methods.
One of those methods is to use lasers to support bore sighting. This technology is even more critical with automatic, semi-automatic, or lever guns.
Aligning guns before firing constantly brings different benefits to us, and bore sighting is no exception. The alignment will make the projectile more accurate.
It will also be easier to control and destroy the target instead of constantly firing bullets and expecting that one shot will hit the target.
Besides, each bullet also helps us save a large number of bullets instead of firing chaotically. So we can conclude that bore sighting helps the bullet track be more accurate, thereby increasing accuracy and reducing the number of pellets.
How To Use Laser Bore Sight Ar 15?
The steps below summarize all the steps that you need to do to be able to use the Ar 15. To get the most accurate operations and not make mistakes or get into trouble. If it’s worth it, you’ll need to review the instructions below carefully.
Check the Chamber
The first lesson that every gun user needs to know is not to play with this weapon. So before doing any action with the gun, you’ll need to make sure you’ve pre-checked that the AR15’s safety mechanisms and components are working correctly.
With the use and installation of a laser bore sight and checking the safety lock, another vital operation you need to perform is to check the ammunition compartment. Please make sure that there are not any bullets, whether real or fake bullets inside.
You certainly don’t want any bullets accidentally fired without your intention. So always be sure to make sure it’s safe before taking the following steps.
Set the Bore Sight up
After ensuring the correct safety rules, we will continue to set up laser bore sight for AR15. The setup steps vary depending on the viewfinder you are using.
There are two versions, one that fits in the cavity like a bullet and the other that you will need to connect to the front of the gun head with a separate fixer.
We can associate the gun head mount type with the external blade models in some ancient gun models. From these differences, you can act in different ways.
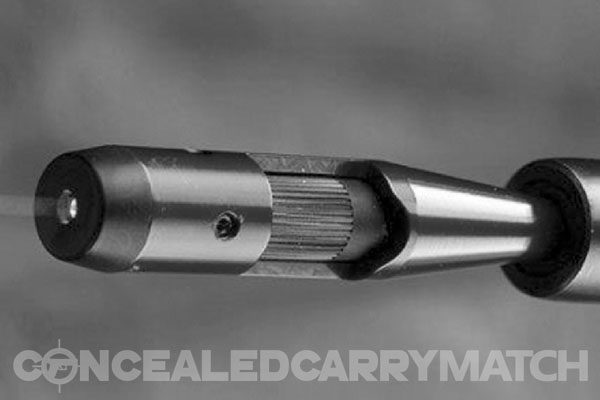
- Builded-in chamber version
The usage of these products is also quite simple. You just need to push the device directly inside the barrel, and that’s it.
The gun’s location containing the ammo will now include the laser bore sight, so the laser’s direction is also the current bullet path.
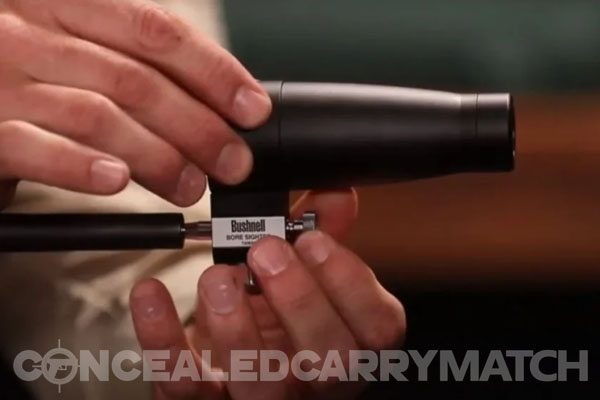
- External version
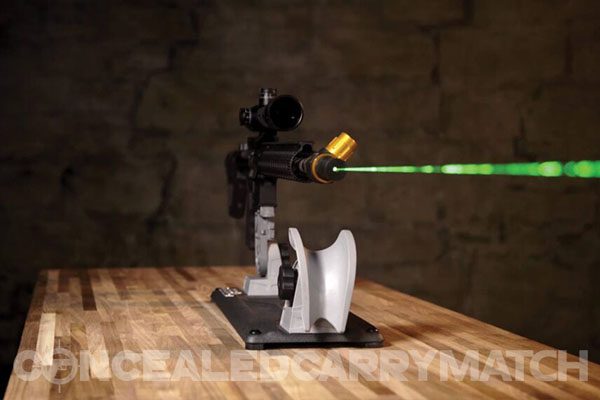
To use this type of product, you must search for the correct type of attachment for the gun size first. After the selection is made, use the screw to secure the jaws to the end of the laser scope.
This action will create a snug spot inside the barrel to keep it in place, while the outside point will act as an alignment.
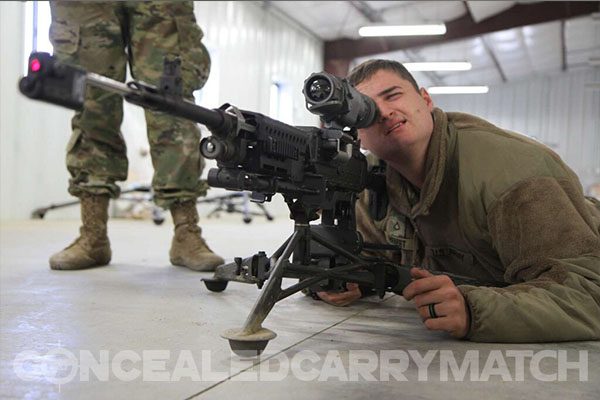
Rifle Stabilization
To get the best alignment effect, you must fix the gun in a particular position.
Usually, this step will not be too difficult when all you need to do is deploy the equipment that serves this job, such as gun covers or specialized racks. Sandbags are still an excellent contingency measure if these tools are not readily available.
In fact, you can still hold the gun yourself and trust your ability to keep steady. After a few activities, you will have to find tools to help you balance.
Dial the scope
In this step, you will need to manipulate the target that we use to replace the object when aligning. If using laser bore sight, you can use the manufacturer’s reflectors in the product.
When the laser beam hits, the reflective layer on the target will also absorb light and reflect it so that we can recognize the direction.
After working with the target, we will continue to adjust the viewfinder and adjust the offset until the reticle aligns with the laser dot.
However, it would help if you kept in mind that we can align effectively only when the distance is far enough in the range of 25 yards to 30 meters.
When operating too close a distance, the accuracy will gradually decrease as we get further away, and the error factors will deflect the projectile.
Confirm the result
At this point, the primary alignment steps are also complete, but you still have to check the results instead of making sure you have a perfect alignment.
Of course, you have the right to be confident that you have done well with the laser bore sight, but being careful is never too much. Therefore, it is best not to skip the steps of confirming the results.
After confirmation, you need to stop calculating some parameters before conducting a live test with actual knitting.
The main reason for this action is that the laser’s nature is that a beam of light has no weight, and the light will go straight for this reason instead of being influenced by gravity and falling slowly like a real bullet. So the factors of weight and fall must also be taken into account.
Finally, remove the laser bore sight and test it directly with real ammunition to get an accurate feel for the effect of the correction.
FAQs
1. What distance should you use a laser bore sight?
25 yards to 30 feet ahead is the ideal distance to work with laser bore sight.
The distance can be about 3 to 4 meters difference; try not to let this number drop to less than 20 yards because the difference will increase a lot this time.
2. Are bore sights accurate?
The eye’s distance is about 100 meters, which is not a large number, but with lasers, the space is even longer and, of course, more accessible to observe, so the accuracy is also very high.
3. Can you aim the iron laser?
You can use laser bore iron sights usually.
Conclusion
So we have learned how to use laser bore sight Ar 15 and gained valuable information about this tool. I hope you can use what the article brings and apply it to your gun. Thank you for reading!
Last Updated on October 28, 2023 by


What distance should a bore sight be AR 15?
The distance at which a bore sight should be set for an AR-15 rifle can vary depending on the specific requirements and preferences of the shooter. However, a commonly recommended distance for bore sighting an AR-15 is 25 yards. This distance allows for a good initial alignment of the rifle’s sights with the bore, providing a starting point for further adjustments and zeroing at longer distances. It is important to note that bore sighting is a preliminary procedure and additional fine-tuning and zeroing-in should be done at the desired shooting distance to ensure accurate and consistent results.